I’ve always been someone that has been interested in taking the more natural and holistic route. However, it wasn’t until I had my first baby that I really started to overhaul everything I consumed. I became hyper-aware of ingredients in food, makeup, skincare products, home cleaning products.. you name it. I recently (and finally) ran out of the one diaper cream I purchased when my son was a newborn and have been so excited to try, perfect, and share this Homemade Diaper Cream recipe with you!
This natural Homemade Diaper Cream is moisturizing, gentle on the skin, and really helps to eliminate redness & irritation once it starts. It’s also clear, so if you get it on your or your baby’s clothes, it won’t leave any residue. Did I mention it also smells great?! If you’re on the market for an easy, gentle, homemade diaper cream that actually works, then read on.
The Benefits of Homemade Diaper Cream
1. Cleaner Ingredients: When you make your own diaper cream, you control exactly what goes into it. No synthetic fragrances, parabens, questionable preservatives, or petroleum by-products—just simple, gentle ingredients that are safe for baby skin.
2. Perfect for Sensitive / Newborn Skin: Homemade creams avoid common irritants found in commercial products. This makes them ideal for babies with eczema, allergies, fragrance sensitivities, or frequent rashes.
3. Nourishes Skin Instead of Just Protecting It: Most homemade diaper creams include ingredients that both protect and heal.
4. Customizable: You can tailor the recipe to your baby’s needs by using more or less of specific ingredients.
5. Cheaper: Buying high-quality natural diaper creams can get expensive. A homemade version often costs a fraction of the price, especially when made in batches.
6. Easy to Make: Comes together in 10–15 minutes with simple kitchen tools.
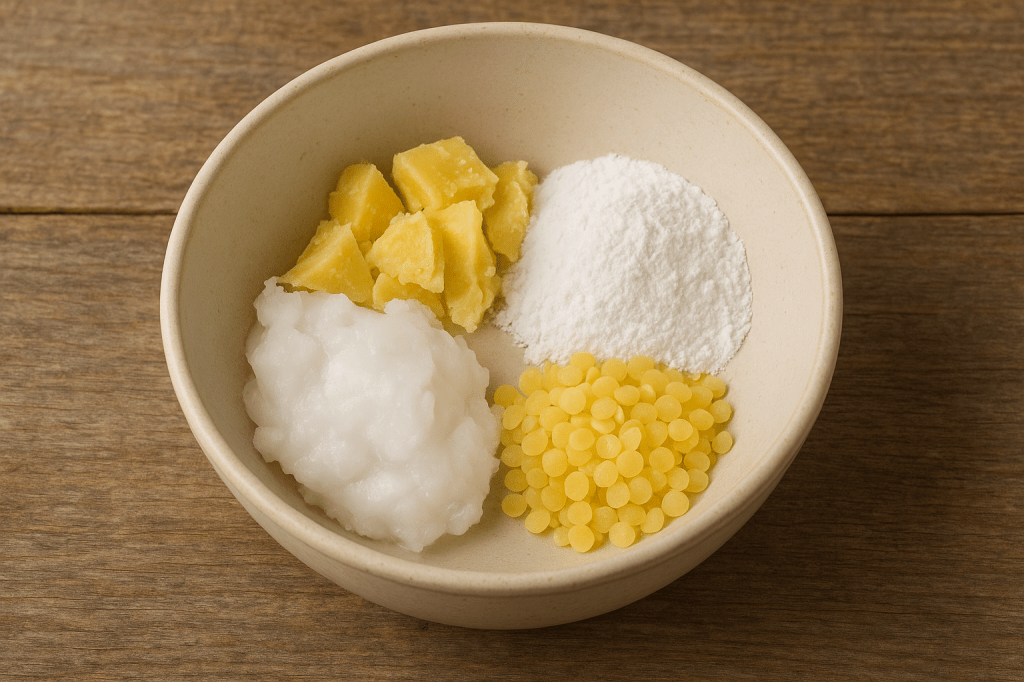
What You’ll Need
- 1/2 cup Coconut Oil: I buy these big tubs from Costco.
- 1/4 cup Cocoa Butter: these cocoa butter wafers have been very handy for several recipes.
- 2 tbsp Arrowroot Powder: save money buying a big bag on Amazon.
- 1 /2 oz Beeswax: these triple-filtered pellets are easy for melting.
- 5-10 drops Lavender Essential Oil (optional): this one is my fav.

How to Make Homemade Diaper Cream
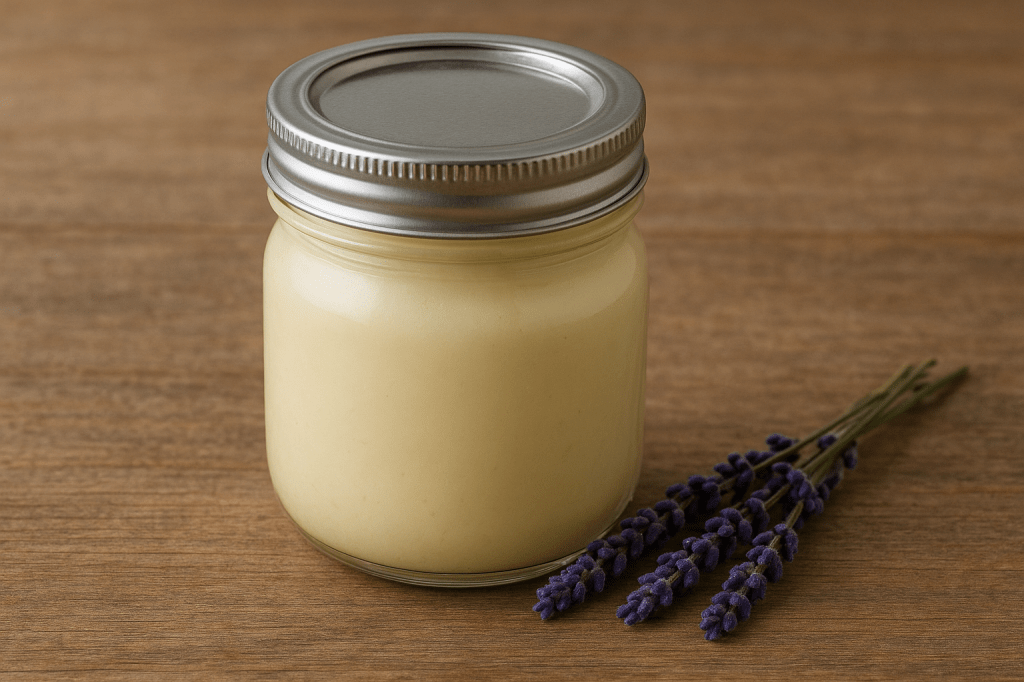
- Sanitize containers you will be using to store diaper cream in. I used small mason jars.
- Melt coconut oil, cocoa butter, beeswax, and lavender oil over medium low heat until completely melted and combined.
- Transfer liquid into a mixing bowl and slowly mix arrowroot powder in with an immersion blender.
- Pour diaper cream into baby food jars.
- Refrigerate for 5-10 minutes to help solidify the mixture. After it’s set, the diaper cream does not need to be refrigerated!
How to Use It
1. Start With a Clean, Dry Diaper Area
Before applying the cream, gently wipe your baby’s diaper area with a soft cloth or fragrance-free wipe. Pat the skin dry.
2. Scoop a Small Amount
Use clean hands or a small spatula to scoop out a pea-sized amount for minor redness, or a bit more for a full-coverage barrier.
3. Warm It Between Your Fingers
If your cream is firm (because of beeswax or cocoa butter), warm it between your fingers for a second. This helps it glide onto your baby’s skin smoothly.
4. Apply a Thin, Even Layer
Gently spread the cream over the entire diaper area, focusing on spots that look red, irritated, or prone to chafing. You should still be able to see the skin under the cream—a thick layer isn’t necessary.

Storage, Shelf Life & Safety
- How to Store Your Natural Diaper Cream: use a clean, airtight container & store in a cool, dark place.
- Shelf Life: up to 12 months
Tips
Reapply at Every Diaper Change
For best results, use the cream:
– At each diaper change
– Especially before naps and bedtime when diapers stay on longer
Consistency helps prevent irritation and keeps skin protected.
Use Extra During Flare-Ups
If a rash is developing, apply a slightly thicker layer to create a stronger barrier.
Ingredients like zinc oxide help seal out moisture and support healing, so consider adding zinc oxide to your cream.
Allow a Few Seconds Before Re-Diapering
Let the cream sit on the skin for 5–10 seconds so it settles and forms its protective layer.
Keep It Clean
To avoid introducing bacteria:
– Use clean, dry fingers
– Or keep a small spatula inside the jar
– Close the lid tightly after each use

Homemade Diaper Cream Recipe
This natural Homemade Diaper Cream is moisturizing, gentle on the skin, and really helps to eliminate redness & irritation once it starts.
Credit: simplelittlemoments.ca
Ingredients
- 1/2 cup Coconut Oil
- 1/4 cup Cocoa Butter
- 2 tbsp Arrowroot Powder
- 1/2 oz Beeswax
- 5-10 drops Lavender Essential Oil (optional)
Directions
- Sanitize containers you will be using to store diaper cream in. I used small mason jars.
- Melt coconut oil, cocoa butter, beeswax, and lavender oil over medium low heat until completely melted and combined.
- Transfer liquid into a mixing bowl and slowly mix arrowroot powder in with an immersion blender.
- Pour diaper cream into baby food jars.
- Refrigerate for 5-10 minutes to help solidify the mixture. After it’s set, the diaper cream does not need to be refrigerated!
- Apply as needed.
Closing Section
I was so pleasantly surprised when I first made this diaper cream. My expectations were fairly low, but I’m just so happy with how it turned out! It gives me confidence to know that I’m nourishing my baby’s skin with just a few simple ingredients that I already have on hand.
I hope you love this homemade diaper cream – let me know by leaving a comment!


Leave a comment